Monday, August 31, 2009

Preparing for the Week Ahead

"We need to talk."

"Oh no, what did I do now? Honey, I honestly try my best, you know I do, but for the life of me I cannot remember which drawer which spatula goes into. I just can't. I've tried. Really. You know that. But I've never been able to determine the reasoning - if any - behind the placement of spatulas in the kitchen, and I probably never will."

"This has nothing to do with spatulas. We need to talk about next week's dishes."

Ah (whew!), indeed we do. Even though you are about the only person who reads this blog, we have really gotten into it. And it's a good thing, since we can't afford go out to eat anymore due to collapsing photography business, furloughs, canceled classes, and reduced hours (yes, we've been hit by all of these).

Instead, we're staying in and trying new and interesting dishes that Jhan gets to make in the copious spare time between her three jobs. And that's exactly why we need to sit down and plan out the next week's food. If we don't, nothing will get made.

Selecting the Next Week's Menu
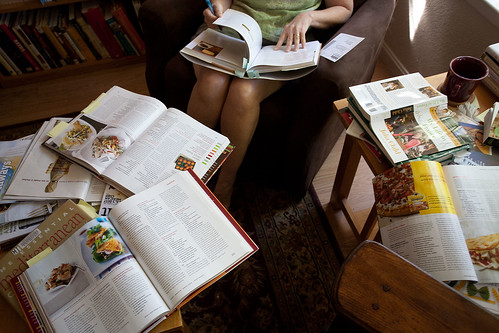
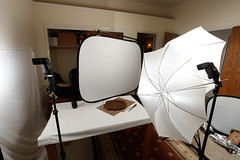
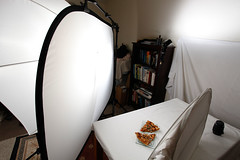
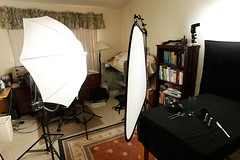
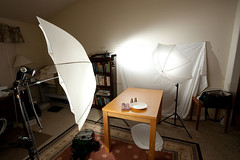
Jhan deep in planning

It's actually a lot of fun to plan the week's 'shooting menu', but something that you don't want to do on an empty stomach.

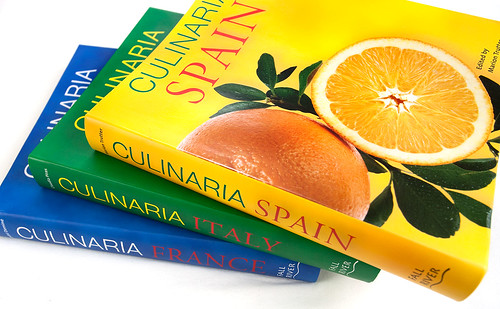
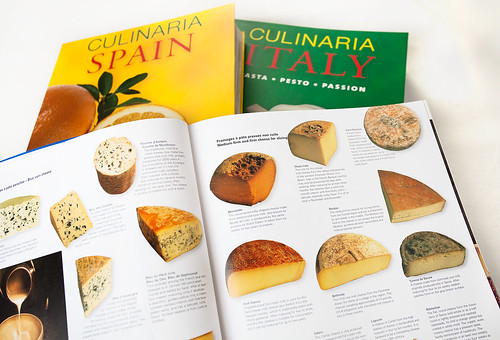
First, we get out every recipe book and every food magazine known to man and dump them in a pile on the coffee table. Then we pour through the recipes (Jhan) and photos (me), looking for something that catches our interest.
"What about shrimp? I love shrimp."
"We could do shrimp."
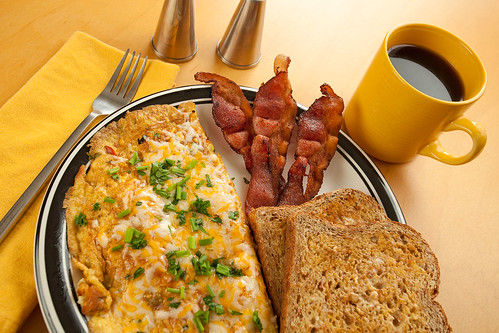
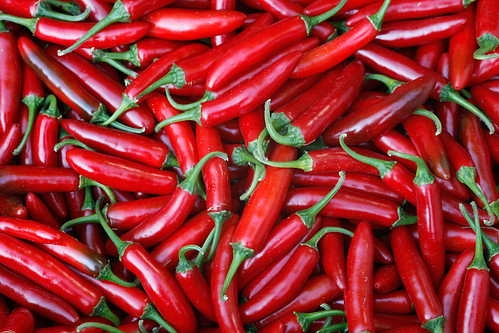
"Here's a recipe for shrimp with bacon and chiles. Everything is better with bacon - even shrimp! And it looks easy; even I could do this one."
"Let me see that."
...
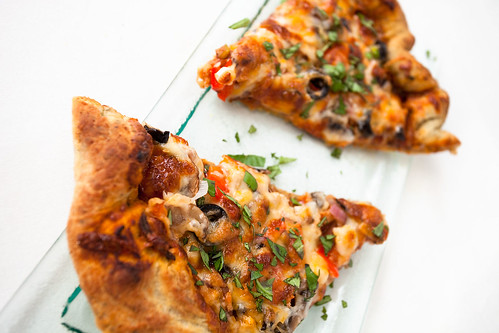
"Mmmmm, pear and goat cheese pizza..."
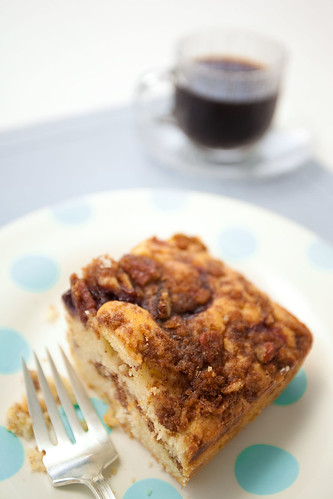
"...chocolate almond bundt cake..."
"...fried haloumi cheese... sounds incredible..."
"...fennel-scented duck breasts in pinot noir sauce... God that look good..."
And so it goes. But we don't just talk about the food - we talk about how it will work photographically as well.
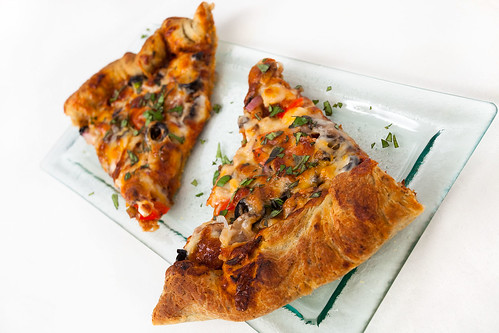
"How about pizza? Here's a recipe for Monterrey jack and asparagus pizza."
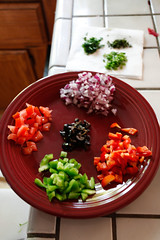
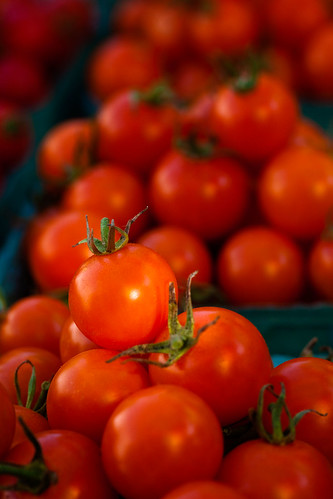
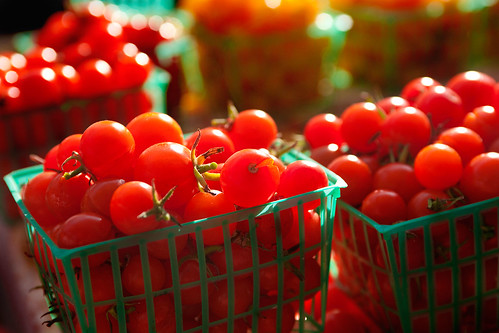
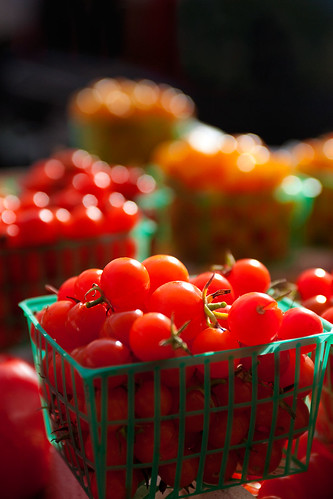
"That'd be green and white, right? Can we add some red for color?"
"I don't think tomatoes or peppers would work in that recipe."
"Well, we need some color. What about making pizzettas - one green and one red? Here's a recipe for a bacon and tomato pizza. That'd be red. The other would be green."
"What's with you and bacon all of a sudden?"
"What do you mean, 'all of a sudden'?"
In the end, we've got three to five dishes for the coming week, and Jhan is off to the grocery store.

And that's how we plan the week's food for the blog. Cooking and shooting it... that's a whole other story.

-----------

Astute readers may have noticed that there is no actual food in this post. However, I hope this post explains why that is the case. Planning. Work. Three jobs. Go back and read it again if you missed any of that.

Sad to say, but you're probably going to see more posts like this as we go along.

Friday, August 28, 2009

A Peach Tarty End to Jhan's Summer

Jhan's summer came to an end last weekend, and we decided to do a major dish last Sunday to commemorate that fact.

As a result, this was one of the first dishes that we planned together from start to finish. I didn't want it to be a hot dish (I'm tired of watching my food get cold) and I didn't want it to be dinner (because I'm hungry at dinner). I wanted something that would just sit there patiently while I photographed it, without wilting, melting, or congealing. Jhan wanted something summery that couldn't be made at other times of the year.

And a peach tart was it.

Peach Tart

The Food (Jhan)

I made a lovely (even if I do say so myself) peach tart last weekend. It was scrumptious!

I love to bake and don't get to do it as often as I would like. Of course, if I was baking all of the time we'd be blimps, and I know that my husband would not be very happy with that, although I also know that he'd still eat every cake or pie or cookie I baked - can't win. Anyway, we found some beautiful peaches at our local natural foods store, and I thought that since I may not have any time to bake anything again until November that I might as well make a tasty tart for our dessert.

You may have guessed that I'm feeling a little bit melancholy about heading back to work, putting an end to lazy summer days hanging about the house in my pajamas, reading the paper, taking a swim, maybe doing a little work in the garden and finally about 5:00 pm looking around the kitchen for something to make for dinner. Really, I'd be bored to death if I did that for months on end but several weeks of loafing can really spoil a person.

Back to the tart- I made the crust with butter, sour cream and flour. The crust is tasty and tender and held up well to an hour plus of baking until the custard was firm. I really loaded the tart shell with peaches which left little room for the custard so even though it didn't overflow when I poured the custard in it did puff up over the sides as it baked. This made for a bit of a hassle in getting it out of the pan but Tony, armed with a turkey skewer - a tool he only recently, and ruefully, discovered (see Stuffed Chicken Breast post) - painstakingly poked around the sides of the tart pan and loosened the sides of the pan just enough to pull it off without a crack or a chip in the crust. Once we had it out of the pan I brushed it with glaze of fresh squeezed orange juice and peach jam. Yum!


The Plating 

Before I shot this, I spent a lot of time on the Internet looking at pictures of peach tarts (warning: be careful when Googling anything with the word 'tart' in it - you might get more than you bargained for).

A lot of the usual type photos came up. I was feeling a bit adventurous for this shoot, so I decided that I wanted some real color contrasts. The opposite of orange is blue or purple, so I decided on a blue background. Well, we don't have any blue sheets, but I did manage to find a couple of blue pillow cases in the linen closet (right, so where are the sheets that go with the pillow cases?).

I also tried a few shots on a white background. Some of those came out OK, but I really liked the ones of the blue pillow cases best. I selected simple flat plates that would handle the full tart as well as a single slice, tossed a whole peach in the background and added a sprig of mint for a touch of green (I'm telling you, that touch of green is my secret weapon).

Peach Tart

The Photography

I know I've complained about the rather weak natural light that manages to find its way into my studio, but right in the middle of the tart shoot we hit the one 30 minute window where the sun actually streams through the door. So I did two lighting set ups - one with strobes and one with only natural light.

Lighting

Peach tart lighting - Flash
For the first batch of shots,I used a pretty typical three light setup - key behind the food and fills to the front left and right. But I added a twist. I positioned the Vivitar 285 to the right of the food, right at the level of the table and put an 85A orange filter over the flash. Why? Because I wanted to create sort of a faux sunset that would cast warm highlights on the parts of the dish that rose up above the edge of the plates. You can see this warm, but subtle effect in the image below.

I like it.

Peach Tart


Peach tart Lighting - Window
When the sun magically appeared, I turned off the strobes, opened the blinds and got as many shots as I could. It turned out that even with a reflector I needed a touch of fill, so I turned the Vivitar 385 back on a 1/16th power and shot it through the reflector, just to soften the shadows a bit.

The first and second shots in this post were made using natural lighting.

Overall, I think this shoot was a complete success, as most accurately attested to by the fact that the tart only lasted a couple of days.

Thursday, August 27, 2009

Stroganoff, Serious Comfort Food

Years ago, when I first heard the phrase 'comfort food', I thought it referred to a specific kind of food. I thought it literally meant mashed potatoes, hot dogs, hamburgers and other such middle class American fare. I didn't realize that 'comfort food' meant whatever food was comforting to you until a black professor I knew began describing comfort food as chitlins and grits and okra. "Yuck. Nothing comforting about any of that," I thought as I started to correct her on what comfort food really was. About the time she started giving me a strange look, it dawned on me what 'comfort food' really meant.

Well, there's nothing more comforting to me than stroganoff. It may not be the prettiest dish on the table, but it's darn tasty.

Beef Stroganoff

The Food (Jhan)

When Tony and I met we found that we had many things in common. Strangely enough we had grown up in the same neighborhood and even gone to the same high school but had never known each other. We also found that one of our favorite foods was stroganoff.

There are many ways to fix stroganoff and I vary mine from time to time but believe it or not we both enjoy our stroganoff made using canned mushroom soup as the sauce base (I use Golden Mushroom instead of Cream of mushroom but both will produce good results.).

I know it sounds tacky and far from gourmet but this blog is about ordinary food that ordinary people might make, prepared and presented in a way to make it just a bit extra-ordinary.

I also use everything from ground turkey to filet mignon for the meat in this dish. For company, steak is certainly the most delectable choice but for a quick week night supper ground meat or a cut like round steak will do fine.

Okay, so the mushroom soup is the base but here's the flavor twist: before I add the soup I sauté the mushrooms, shallots (tip: a key ingredient) and thinly sliced onions in butter until slightly caramelized. To that mix I add 1 tbsp of good quality dijon mustard, 1 heaping tbsp of ketchup and about 1/8 cup worchestershire sauce. I let the mix cook for a few minutes and then I add about 1/2 -2/3 cup red wine. I cook this down until it has thickened and is no longer watery, then I add the soup and some cracked pepper. No need to add salt as the canned soup makes it salty enough. I don't usually add any water unless the sauce is way too thick.

After the sauce cooks for a few minutes and the flavors have blended, I add the sour cream (Greek yogurt works well if you are using ground turkey or shredded chicken) and mix in just to blend and to heat through, now you're done. You may want to sprinkle some freshly chopped parsely or thyme on top to add a bit of fresh flavor.

Tony likes his Stroganoff served over mashed potatoes and I like mine on rice - this is just the difference in how our mom's made it - but egg noodles are traditional and look lovely with this rich looking sauce.

Beef Stroganoff

The Plating (Tony)


Stroganoff is basically a gooey brown sauce with unidentifiable chunks of something in it, poured over noodles, rice or mashed potatoes. Not really the most appetizing-looking dish. I figured that I could really go to town with the plates and props and stuff in order to fancy it up, but after the infamous stuffed chicken debacle, I wasn't in the mood to go all out.

So I kept it really simple: sqaure dish, brown napkin, knife, fork and a sprig of basil. I made a U-shaped pile of potatoes in the dish (high on the sides, low in the middle), and then spooned the stroganoff into the center. I also tried putting a wooden block under the dish - that worked as well.

Beef Stroganoff

The Photography

Beef Stroganoff Lighting
Fairly straightforward "surround sound"™ lighting on this shoot. Key light behind the food (to the right in the photo). Primary fill to the front left of the food, secondary fill to the right. This sort of lighting set up gives very even bright light, so popular in food photography today.

The orange? The orange is the food's stunt double. Seriously. Whenever there is anything particularly dangerous the food has to do, the orange comes in and doubles. Actually, I use the orange to test the lighting and shadows. If it were white it would work better, but the round shape lets me see bright and dark spots, highlights and shadows.

Wednesday, August 26, 2009

Fresh Herb, Mushroom and Ricotta Stuffed Chicken Breasts

Up to now, I've really been enjoying this project. Sure, it's a bit of a pain always having to eat cold dinners, but I make up for it by drinking more wine. I'm not really sure how that makes up for eating cold food, but it's been working so far.

Ricotta Stuffed Chicken

Up until this meal. This evil, evil meal. Looks harmless, doesn't it? Stuffed chicken breast on a bed of pasta... sounds easy and tasty (well, it was tasty, particularly the sauce!).

But how could a piece of chicken be evil? What could possibly go wrong? Well, it all started with the plating... but I'll get into that after Jhan gives you the recipe.

The Food (Jhan) 

These stuffed chicken breasts have a really nice herb flavor that blends well with the savory mushrooms and the creamy ricotta. I love fresh herbs and put them in everything. I developed this recipe because some of the other recipes that I had used produced fairly bland stuffing combinations or smothered everyhting in pasta sauce and melted cheese. I wanted to taste all of the flavors in the dish.

The recipe (for 2 servings):
1 slice bacon
2 boneless skinless chicken breasts
2 handfuls well rinsed and dried fresh spinach - roughly chopped or torn, and stems cut off
1/2 cup sliced crimini mushrooms
1 small minced shallot
1 clove minced garlic
1 1/2 tbsp chopped fresh oregano
1 1/2 - 2 tbsp chopped fresh basil
1 tbsp butter
1/2 cup ricotta cheese
1/3 cup grated Parmesan
1/4 tsp fleur de sel
cracked black pepper to taste
1tbsp EVOO
Sauce
1cup chicken broth
2tbsp butter
2 tbsp flour
1/3 cup white wine (we used chardonnay)
squeeze of 1/4 - 1/2 lemon ( to your taste)
salt and pepper - if needed
Additional chopped herbs for garnish.
2-4 Toothpicks


Directions:
  1. Saute the bacon in a heavy frying pan. Drain on paper towel, pour out the bacon grease but do not wipe out pan. Chop or crumble bacon into small bits.
  2. Melt butter in skillet and saute mushrooms, garlic, and shallots until sft and lightly browned.
  3. In a mixing bowl combine the oregano, basil, spinach, ricotta, bacon and parmesan. Add the cooked mushrooms, garlic and shallots. Mix together. Add Feur de sel and cracked pepper. Taste for seasonings.
  4. Place one chicken breast at a time into a large freezer bag. Pound breast with a mallet until thin and flat - do not tear meat. Place pounded breast flat on a plate or baking sheet. Repeat for second breast.
  5. Divide stuffing in half between the two breasts. Spoon filling into the center of the breast at it's widest part. Roll up breasts to cover stuffing - tucking in any stuffing that comes out the sides. Secure the rolls with toothpicks or small metal turkey skewers.
  6. Using the same skillet as for Bacon and Mushroom mixture heat EVOO. Saute stuffed breasts until evenly browned and cooked through, about 10-12 minutes. Remove from pan to let rest.
  7. For sauce; add butter to pan and melt. Add flour and cook about 2 minutes or until just browned and a smooth roux is formed. Add chicken stock to roux, stir, scraping any browned bits from bottom of pan. Add wine and stir well to form a smooth sauce, add salt and pepper to taste.
  8. Cut chicken breasts in thick slices on bias. Arrange slices on plate, spoon sauce over slices and sprinkle tsp. of chopped fresh herbs over all.

Ricotta Stuffed Chicken

The Plating (Tony)


It all started to go wrong when we took the breasts out of the frying pan. I wanted to cut them in half at an angle and plate them on a pile of pasta, so I grabbed a knife and started cutting.
"Jesus, what's in this!?!"
"Nothing, why?"
"Well, I can't cut through the breasts!" (said as I'm hacking away at them like a drunken Canadian trying to chop down a steel telephone pole for firewood)
"Well, they have toothpicks in them. Metal ones."
"They do?!?! Why didn't you tell me?"
"What do you think is holding them together?"
"Hell if I know; you're the cook!"
I'm not trying to blame Jhan here, just trying to explain how this shoot went wrong. See, I had all the lighting set up so that cut side of the breast would face to the right and pick up a nice fill on that side. But my amateur hacking had so mutilated the thing that I had no choice but to cut it the other way, facing left, to hide the carnage. So the lighting I had set up was all wrong. The shoot was doomed from the get go.

Otherwise, this was a simple set up - chicken stacked on the pasta, chardonnay sauce dribbled on top, chopped basil on top for color, sliced bread in the background.


The Photography

Doh!
I spent 45 minutes shooting this damn plate, but I could never get the lighting right. Originally, I had key light in back with a strong fill to the right, but with the cut breast facing left, it was always in shadow. The way my studio was set up it was not as simple as moving the fill to the left side; there wasn't room for it. Feeling rushed as I always do during these dinner shoots (hey, I do want to eat, OK?), just kept shooting, hoping something would turn out, but even after several lighting moves it wasn't working.

By the end I had taken so many photos that my batteries were beginning to die and were taking longer and longer to recharge the flashes - that didn't help either. The only reason any of these photos look halfway decent is because of the miracle of Photoshop.

The image at left was pretty typical of this shoot: poorly composed, underexposed and out of focus. 

Lessons Learned
  1. If the lighting isn't working, don't keep taking pictures. Stop and fix it.
  2. Don't feel rushed during the shoot, or you may end up taking even more time
  3. We still have a bit more communicating to do before we work all the kinks out

Tuesday, August 25, 2009

New Studio and Mushrooms

I rearranged my office last week so that I could take advantage of the light coming through the huge sliding glass door at one end.

This was no minor undertaking since my 60 year old solid wood desk (which would survive a nuclear attack, unlike that crappy IKEA junk that can't withstand a stiff breeze) weighs several tons and is no mean feat to move an inch, much less across the room. Not to mention the Medusa's hairdo of wires, cables and other computer-related crap that had to be unplugged, moved and then re-plugged. It took an entire evening, but I figured it was totally worth it - glorious natural light would be mine!

With my desk is no longer blocking the window, I decided to try to take some photos with nothing but the wonderful natural light filtering in through the glass door. Wanting something light and simple (and being incredibly lazy), I grabbed some mushrooms out of the fridge, stuck them in a white bowl and put them on a table in front of the glass door.

That's when I made the unfortunate discovery that there really ain't a whole lot of light coming through that big door. It seems pretty bright sitting in an otherwise dark room, but except for those few minutes a day when the sun manages to actually emerge from behind the tree, the fence and/or the neighbor's house and shine directly into the room, there isn't enough light to come near hand-holding the camera.

Great. I practically give myself a hernia moving that monolith of a desk, fight with an intractable nest of wires... and for what? Well, I sure as hell ain't moving everything back, so it's going to have to do.

Mushrooms


Even though these photos seem very simple, I ended up doing a heck of a lot of work in Photoshop to get them even close to what I wanted. The most obvious thing I did was adjust the white balance of the images to give a blue tint suggestive of outdoor light filtering into a room. But the quality of the "outdoor light filtering into the room" was such that I had to add several layers of levels and color balance adjustments to make the photos look decent.

Mushrooms

As a result, I'm not so thrilled with the results of my move, but hopefully, I'll adjust.

Mushrooms

The Lighting

Mushroom Lighting
 As you can see, I ended up having to add some fill flash to light the mushrooms. I stood the big reflector against the door to soften the light coming in. Even with reflectors on both sides of the subject, I couldn't get enough light. Obviously, I'm going to have to play with this in order to figure out the best way to use the light.

Monday, August 24, 2009

Marinated Tofu and Spicy Stir Fried Vegetables

Mmmm... tofu.

Seriously, I love tofu. I lived on a sort of hippie commune in the middle of nowhere for several years in the late 70's, and about the only protein I ever got was tofu and the occasional tiny bit of cheese. So I learned to love it. Tofu and miso soup. Fried tofu. Tofu sandwiches. Yes, tofu sandwiches.

So last week, trying to come up with something new for the blog, Jhan decided to try marinated tofu, and it allowed me to try out some Asian-looking plates and dishes I'd bought. Turns out it was delicious.

Marinated Tofu and Stir Fry

The Food (Jhan)


I love tofu too.

Tofu can be bland and tasteless but if flavored properly it can be a tasty treat. One of the tricks to flavoring tofu involves marinating the tofu with some combination of sauces and spices that includes oil and vinegar (try different oils and vinegars to change the flavor profile). Both the Tassajara Cookbook and Mollie Katzen (can't remember which cookbook) offer great basic tofu marinade recipes to use as a pattern to create flavorful tofu tailored to your taste.

I use firm or extra firm tofu and I always press the water out of it - some recipes say to freeze the tofu first and then thaw and press the water out - either way is fine depending on what texture you prefer for your tofu and sometimes the cooking method you'll use. For this dish I marinated the tofu with sesame oil, balsamic vinegar, garlic salt, crushed red peppers, green onions, black sesame seeds and a little soy sauce. I added some honey to sweeten the marinade slightly - you can use agave nectar or brown sugar if you want. The sesame oil is a very strong flavor but goes well with the veggies in the final dish.

After marinating the tofu overnight I baked it on a parchment lined baking tray at 400 degrees for 25 minutes. The baking produces a tofu that is crispy on the outside but soft and creamy on the inside.I stir fried the veggies with salt, cracked black pepper, crushed red peppers, ginger and added a tablespoon of General Tso's stir fry sauce at the end - you can use any thick soy or teriyaki sauce you like, peanut sauce is also great.

The Plating

Like I said, I wanted to try out some Asian-looking dishes, and once I saw how Jhan was preparing the food, I decided to go with a rectangular plate and placed four of the tofu squares on the plate. I wanted to put down five (because odd numbers are compositionally more dynamic), but I didn't have room.

I thought the plate looked a bit boring with just the tofu squares on it, so I got the bright idea of dripping some sriracha sauce on the plate to add a bit of color. I almost freaked out when I saw the huge red blobs start to splatter on the plate. God, those drops were HUGE, and not the effect I wanted at all. But it was too late. I cursed myself for ruining the shot, but went ahead with it anyway (tasted great, though!).

On the shoot table, I went with a dark brown table cloth and a round light brown place mat to accentuate the color of the tofu. I put the white rice in a black bowl and the stir fried vegetables in a white bowl. Chopsticks completed a simple, but clean presentation. Circles on the edges, rectangles in the center was the theme of this composition.

In the end, I've been able to look past the blood-splattered plate and to enjoy the lighting and the composition, but next time I'll think twice before adding something like that to a plate.

Marinated Tofu and Stir Fry

The Photography

Marinated Tofu and Stir Fry Lighting
I really liked the lighting in this shoot - kind of moody, with pronounced shadows. The dark table cloth contributed to it, but so did the placement of the lights.

I put the key light high and on the right, but zoomed tight and  pointed down on the food. This left some pronounced shadows. The rear fill and left fill were turned down provide relatively little light, and the low position of the left fill insured that it wouldn't fill many shadows.

As a result, I got what I think is some of my best lighting to date. Let me know what you think.

Saturday, August 22, 2009

Saturday Morning Pancakes

Saturday morning - the perfect time for pancakes. We got some outrageously huge and tasty blackberries from the farmer's market and tossed them on top. Scrumptious.

Pancakes and Blackberries

The Photography

This was a pretty straightforward shot, done in the studio on a black cloth. Fairly typical two light lighting for me - 430EX through a reflector behind the food, with 580EX through an umbrella to the right of the food as the main light. Notice the reflections on the syrup caused by the reflector.

For the record, these were some of the best blackberries that I've ever had.

Here's a more boring composition, but still with good reflections and specular highlight (particularly on the blackberries) from the rear light:

Breakfast of Champions

Most people like to do these sorts of shots on a white background, but honestly, I think that black highlights the food more, and concentrates the colors.

Lessons Learned
  1. Butter is hard to work with and melts fast. Don't put it on the food until the very last second.
  2. Syrup soaks into pancakes very quickly. Don't put it on until right before the butter. Chilling the syrup might make it a bit easier to handle and not as runny.
  3. Use real butter - margarine (used in this shoot) looks like margarine.

Thursday, August 20, 2009

The Lying Liars are Lying

So now we're starting to get to the place where we start to lie about our food.

Rotisserie Chicken

Nice looking chicken, right? It filled the house with incredible aromas as it roasted in the oven, garnished with herbs and lemon.

Well, no. This is actually a Costco rotisserie chicken. So sue us.

Listen, you can't cook every day, so we bought a Costco bird (you know how yummy they are), tossed it in a roasting pan, added some herbs and bit of seared lemon and voila! - instant visual roast chicken bonanza.

So, is it really lying to present it this way? I don't think so - in fact you could serve this to company and they'd never be the wiser.

The Food

Well, there's not much to say about the food that hasn't already been said, but the lesson I learned from this is that you can take store bought food and very easily dress it up to be presentable to company.

Rotisserie Chicken

The Photography

Rotisserie Chicken Lighting
Three lights again, but this time I pointed the Vivitar at the wall, since it puts out the most light. I also pointed the 430EX right at the chicken (form the left rear) without an reflector or brolly to try to generate some specular highlights.

Nothing particularly creative here, but it's effective.


Lessons Learned
  1. A few herbs can go a long way to dressing up a dish
  2. Store bought food can be served to company if you style it a bit

Wednesday, August 19, 2009

Blackberry Jam Streusel Coffee Cake

Jhan: Ah, the weekend! Finally I have the time to cook and eat something other than toast for breakfast. I really like omelets and scrambles for weekend breakfasts but every now and then I just want something sweet and fruity, that's when I bake a coffee cake. My favorite is this struesel coffee cake.

Coffee Cake & Coffee

The Food

I often add blueberries or some other fruit in the middle but if I'm out of fruit I just use jam (Blackberry or Boysenberry produce great results). I also prefer pecans to walnuts for the streusel. I like the rich toasty flavor of the pecans, sometimes roasted walnuts taste bitter to me. This recipe is super easy and fast - it can be ready to eat in about 35-40 minutes or you can bake it the night before and just heat it up in the morning. This is a great thing to serve house-guests, add some fresh fruit and coffee or tea for a nice light breakfast then head out for some sightseeing or shopping.

The recipe:
Preheat oven to 375, spray 9x9 square baking pan with a little cooking oil
1 3/4 cups flour
3/4 cups sugar
2 1/2 tsp baking powder
1tsp salt
3/4 cup milk
1 egg
1/3 cup canola oil
Mix dry ingredients together with a fork. Mix wet ingredients together and pour into dry ingredients. Stir well or beat for about a minute or until batter is fairly free of lumps.
(The batter may seem a little thin.) Pour about half of the batter into the pan, spread to cover bottom of pan. Next add fruit or jam. Spread chopped (well drained) fruit or berries - about 1 cup - over batter. Raisins or dried cranberries are also good - decrease to about 1/3-1/2 cup or if using jam, spoon 1/3 cup over the batter in bottom of pan. Add a sprinkling of the streusel over the fruit or jam. Pour the remaining batter over the fruit and streusel layer - try to completely cover the center layer. Sprinkle the remaining topping over the batter. Bake about 25-30 minutes or until cake tester inserted in middle of cake comes out clean. (It's a good idea to check this cake after about 20 minutes.)

Streusel Topping
1/3 cup packed brown sugar
Scant 1/4 cup flour
1/2 tsp cinnamon
1/3 - 1/2 cup chopped pecans
2-3 tbsp s melted butter
Mix all together. It should be crumbly
This recipe was inspired by recipes found in Betty Crocker's Cookbook and the Better Homes and Garden Cookbook.

The Photography

Coffee Cake & Coffee

Coffee Cake & Coffee Lighting
Yet another shot with three lights. Did I mention that I light the softness I get with more lights? I did? Really?? Side, ceiling bounce and wall bounce. About all you need to know.

More interesting to me was the set up, with the coffee cup, the place mat, the polka dotted plate and the silver fork. All these items were selected specifically for this shoot. I particularly like how the plate and place mat match colors.

This was a simple, quick shoot - the coffee was still warm when I finished.

Tuesday, August 18, 2009

Hanger steak with Chimichurri sauce

We talk about this blog a lot, my wife and I. Neither of us is sure what to make of it quite yet. But one thing that we have figured out is that food needs to be colorful to be appealing in a photograph. In particular, it needs some bit of contrasting color to stand out from the browns and earth tones typical of most foods.

So Jhan decided to make a chimichurri sauce - a bright green Argentinian sauce made of herbs that I'd never ever heard of before (warning: it's delicious).

Hanger Steak with Chimichurri Sauce


The Food


Hanger steak is such a good deal and great for marinated and grilled dishes -just don't overcook it.

For tonight's dinner I marinated the hanger steak in a balsamic marinade and grilled it in a very hot oiled cast iron skillet - about 2 minutes on each side for rare. The Chimichurri sauce was a mix of finely chopped parsley, fresh oregano, garlic, red onion and crushed red peppers. I mixed the herbs with equal parts EVOO and red wine vinegar and added salt (I use kosher salt for these types of sauces, sea salt for pasta water, etc. - various salts make an amazing difference it the taste of a dish.) and cracked black pepper to taste.

I paired the steaks with some roasted red peppers and creamy mashed potatoes. The Chimichurri really makes this dish, the steaks were tender and done just right, the peppers were a good flavor addition with the herbiness of the sauce and of course mashed potatoes are just plain good with everything. I added a tomato salad with a balsamic vinaigrette to round out our dinner.

Hanger Steak with Chimichurri Sauce


Tomato Salad

The Photography

Hanger Steak with Chimichurri Sauce Lighting Set Up
Another three light set up. Now that I've gotten used to using the Vivitar tethered, I really like the even lighting I can get using three lights. This lighting is similar to the pizza lighting except that I effectively have lights on all four sides: Vivitar 285 in front, 430EX to the left, 580EX bounced off the wall in back, and a large reflector on the right. This gives a very even but not featureless light. I like it.


In the photo below, notice the slight shadow to the right - noticeable, but not strong. That was the effect that I wanted.

Hanger Steak with Chimichurri Sauce
Lessons Learned
  1. Chimichurri is wonderful stuff
  2. Even lighting doesn't have to be dull
  3. Color contrasts really are important

Monday, August 17, 2009

Turkey Pizza

We love pizza. Who doesn't? But there are precious few places in town that make a decent pizza. So, most often, we (and by "we", I mean Jhan) make our own. This particular turkey pizza was one of the best we've eaten.

Turkey Pizza

The Food

Going out for Pizza can be a bit pricey in these days of furloughs and job cuts, so I've taken to buying the little bags of fresh pizza dough at Trade Joe's ($1.19). These are easy to use and particularly the herb flavored crust is great. While the dough is resting (20 minutes) I scavenge the pantry and fridge for toppings. Once the 20 minutes are up, I roll out the crust and add sauce, spices and toppings. A little drizzle of EVOO over all and into the oven for about 12 minutes. The fresh dough and spices make the kitchen smell great and it makes a beautiful and tasty meal.

Making pizzas at home has led me to really experiment with toppings, and I've found that some of my favorite fixings are rotisserie chicken, fresh mozzarella slices, roasted asparagus and kalamata olives - not all on the same pizza but it's tempting.

For our most recent pizza we were out of all of chicken, so I sauteed some ground turkey breast with fennel seeds, Italian seasoning, dried oregano and crushed red peppers. The meat took on a spicy sausage like flavor - yummy (and low in fat too). I sprinkled chopped garlic, sliced crimmini's, olives and chopped fresh basil over the meat and pizza sauce. I mixed Mozzarella with some shredded Jack and Cheddar cheeses and added a touch of garlic salt, a drizzle of EVOO and into the oven. This was one of our best pizzas - Tony finished the last two slices and never even offered me a bite. :( !

The Photography

Turkey Pizza

OK, I know I'm probably headed for a rut, but while I was at Barnes and Nobles last week, I was perusing the Michael Mina book, and got to really admiring the simplicity of the photography. Everything was shot high key, white backgrounds, no props - just food on white plates. Simple and clean: it was all about the food.

For this pizza, I wanted to focus on the dish. I used the long rectangular glass plate as a way to contrast the triangular shapes of the slices. I love this kind of compositional stuff. The photo, above, was a simple foreground-background combo, but I also played with shooting at odd angles, below.

Turkey Pizza

I love the cleanliness and simplicity of this set. I did have to chop some basil at the last minute to add a bit of extra color.

The Lighting

Turkey Pizza Lighting Set up
I'm beginning to love having three lights now. For this shoot, I aimed one flash at the back wall, and shot the other two side-by-side through a large reflector. That gave me really even bright lighting that obviates the need for props. Very clean, very simple.


Lessons Learned
  1. Simple is good
  2. More light is good
  3. Playing with geometric shapes is fun
  4. Don't forget to add a bit of contrasting color!

Sunday, August 16, 2009

Food Nuts

I admit it, my wife and I are food nuts.

Case in point: I recently discovered a Barnes and Noble gift certificate Jhan got me for my birthday and had never used. So yesterday (after shopping for nice dishes for this blog), we traipsed over to the local B&N. First stop: the bargain cookbook aisle - me for food pictures, my wife for actual cookbooks.

The first thing that caught my eye was a thick tome titled Culinaria France. The first thing that caught Jhan's eye was similarly thick tome titled Culinaria Spain. It didn't take us long to discover Culinaria Italy lurking on the shelves as well (alas, no Culinaria Greece that we could see - though Amazon has it).

Culinaria Spain, Italy, and France

We spent the next 45 minutes engrossed in these books - each a region by region exploration of each country's cuisine, complete with detailed break downs of regional wines, cheeses, breads, seafoods, etc., as well as a plethora of recipes and interesting food bits (The easiest way to tenderize octopus? Leave it in the freezer for three days.).

The best part? Each 500 page book was $14.98!

We never made it past the bargain aisle. With our B&N discount and my $30 gift certificate, we waltzed out of the store with all three books for less than $14. Score!

We're pathetic.

Culinaria Spain, Italy, and France

Thursday, August 13, 2009

Salmon with Korma Sauce

My wife loves salmon, and over the course of the coming year, you're going to see a lot of it. I'm not as big a fan of salmon, but I'll eat it, particularly smothered in korma sauce.

BTW, I love these photos. I think they are some of my best yet... so enjoy!!

Salmon with Korma Sauce

The Food

A few years ago when we didn't have any Indian restaurants here in town we would make special trips out of town just for a taste of Lamb Korma, Tandoori Chicken, Baigan Bharta or a Mango Lassi. Then, unexpectedly, I found out that I would be attending a class in Yuba City every Tuesday - a town with an Indian restaurant - that's how our Indian food Tuesdays began.

During the break period of each class I'd pull the restaurant menu out of my purse and call in an order. Once I'd picked up the food I had an hour drive home with the incredible aroma of keema naan, curry, samosas and tandoori filling up my car. I had a hard time not digging into the food as I drove. Once home, we would rip into the various take-out boxes and bags and gorge ourselves. Finishing the class was bittersweet- no more Tuesday night Indian food runs. I had to find a new way to provide our Indian food fix. Home cooking became the answer.

Salmon Korma isn't strictly Indian but I like the flavors of the mild baked salmon and varied vegetables with the thick slightly sweet and tangy Korma sauce. I also make this dish with chicken or lamb - whatever we have on hand. I rubbed the salmon with a mix of garam masala, turmeric, red pepper and ground coriander and sprinkled some EVOO over the top before baking. The veggies were stir fried and the rice was flavored with crushed coriander,and pink and green peppercorns. In all honesty I don't make my own Korma sauce but I usually jazz it up a little by adding more ginger, a fresh bay leaf or more coriander, etc. and sometimes I let the meat and veggies simmer a while in the sauce. A dollop of Greek yogurt can be added at plating or added to the simmering sauce towards the end of cooking. Naan is a good accompaniment to the Korma dish. (Trader Joes sells a decent packaged naan, we've found that the Masala Tandoori Naan has the most flavor.)

The Photography

For this shoot I really wanted to try something different; something that would set off the food. The big thing these days is high key images of food on white plates on white table cloths, flooded with light. It makes the food seem to float in the air. That's great, and I'm a fan of that style.

But for this shoot I decided to go the opposite direction, with a black plate on a black background with silver utensils. I thought the darkness would effectively isolate the food as the center of interest, and I was right.

I loved every single shot from this shoot, and had a very difficult time selecting the best photos.

I loved the reflections that the plate gave, and the velvety feel of the dark plate and cloth.

Salmon with Korma Sauce

I could have shot this all day, but it was cold enough as it was by the time I got to eat it.

Salmon with Korma Sauce

Isn't that a beautiful plate? Unfortunately, Jhan cracked it while washing it after dinner, and we had to throw it out! But I will be actively trying to replace it, so hopefully, we'll see more shots like this as we go on.

The Lighting

Salmon with Korma Sauce Lighting
This was my first shoot with my new 40x60 inch reflector. I put the Vivitar 285 and the Canon 430EX behind the large reflector and pointed the 580Ex at the wall behind the plate. This is darn good general lighting and works well for low key lighting like this as well as high key lighting (as we'll see in a few posts).


Lessons Learned
  1. High key lighting isn't the only way to go.
  2. Black plates and backgrounds can really accentuate the food
  3. Plate reflections can be important
  4. You need to be very careful washing the dishes

Wednesday, August 12, 2009

Mediterranean Omelette

My favorite breakfast is simply a bagel and coffee, but Jhan leans more toward eggs, particularly omelettes.

Omelette Breakfast


So we made a big omelette. We had quite a bit of trouble flipping the omelette (that was not a pretty sight, with both of us holding spatulas and pushing the omelette around the pan), and we had even more trouble getting it out of the pan and onto the plate. I was holding the plate and trying slip the omelette out from below. Jhan was holding the pan and trying to push the omelette down from the top. We were both yelling at each other that we were doing it wrong. Ah, married bliss!

Finally, we managed to get the uncooperative mass onto the plate with only minor damage. Honestly, it wasn't the prettiest omelette in the world, but it tasted fine.

The Food


Herbs and Veggies for omelette
A few mornings ago, I decided to make a three egg omelette stuffed with bell peppers, red onions, tomato and black olives. I added fresh rosemary, chopped chives and some flat leaf parsley to the eggs as I whisked them.


The omelet was cooked in a little EVOO and butter. Shredded jack and cheddar cheese, and some extra herbs, were melted over the top of the dish before plating.

I really like my omelets to have a little color and a bit of "crust" on them - I know many people like the yellowy very lightly cooked look but an omelet that is just browned a bit and that puffs up in the pan really makes me feel like I'm digging into a treat prepared in a mom and pop cafe in France. Yum!

The Photography

I wanted to play with color in this shot. We've really been focusing on getting contrasting colors into every shot so that the food doesn't look monochromatic. But I was getting tired of having to have some red or green in every shot, so for this shoot I said 'screw it!', and decided to play off the food's natural color.

Eggs are yellow, so I ran with yellow. Yellow table top, yellow napkin, yellow mug. And it worked!

Omelette Breakfast

I like the simplicity of the color palette, I like the color reinforcement that the yellow components provide, and I like the cheery summer morning feeling that the yellow provides. In fact, this breakfast was the start of a really great day.

Lighting

Omelette Lighting
This was my first three light shoot! Though I've had a Vivitar 285 for a long time, I have no way to trigger it remotely, and I hate shooting tethered. But for this shot, I decided that it was worth it. I put the Vivitar in the front at 1/16th power. I shot another flash through an umbrella at the right rear and bounced another off the wall at the left rear. The flash bounced off the wall provided the nice glare on the table.


Lessons Learned
  1. Sometimes a monochromatic palette communicates what you want best
  2. Three lights can give an effect not too different from large lights
  3. Don't fight with your wife over food

Tuesday, August 11, 2009

Farmer's Market

OK, so not every post is going to be pictures of my dinner getting cold.

Last Saturday we went to the local farmer's market, and I have to say that it was wonderful to get outside with some real light where I could use skills that I actually have, instead of stumbling around in the studio trying to figure out lighting ratios.

We went relatively early to the market (8:00AM) in order to get some nice early light, and there was plenty to be had.

Check out the nice sun spotlight on these loaves of bread:

Bread

Or on these:

Loaves of Bread

But bread wasn't all that I took photos of. There were plenty of fruits and vegetables. I had a field day and can't wait to do it again!!

Here are a few of my favorites. And oh yes, you'll be seeing some of this stuff in my coming posts.

Red cherry and yellow pear tomatoes

Cherry tomatoes

Chile peppers

Chile peppers

Mix of Tomatoes

Cherry Tomatoes

Cherry Tomatoes

Blackberries