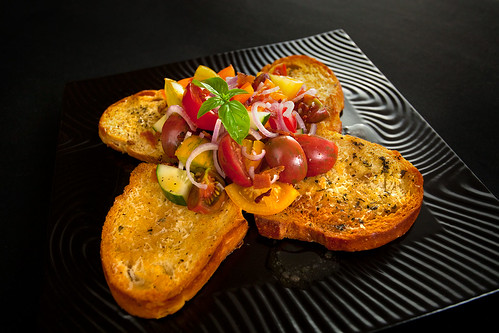
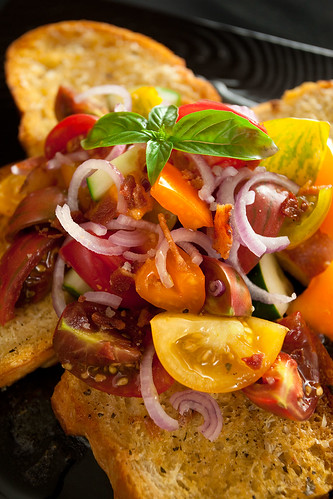
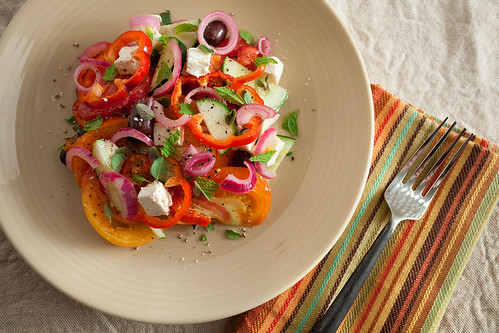
This is the last post for Tomato Month, and fittingly (given that it's the end of summer), it's a salad. And actually, the tomatoes, as delicious as they've been, aren't really the star of this dish - it's more of an ensemble.
Jhan and I both love farmer's salad; it's a great, fresh and refreshing dish.

The Food (Jhan)
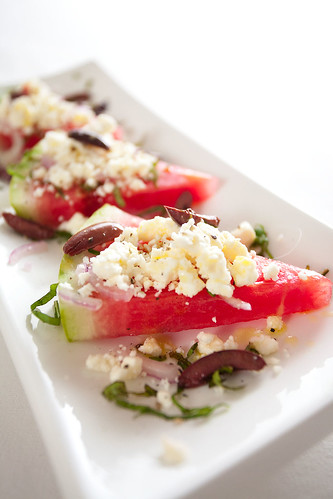
This is one of my favorite salads. I can't wait for summer to come so I will have beautiful ripe tomatoes and fresh from the garden peppers and cucumbers to use for this recipe. The salad is juicy, refreshing and very tasty.
Farmers Salad is a very hearty salad and can easily become a meal if served with a good quality crusty bread. This salad is also perfect for a very hot day since it requires no cooking and the ingredients can be chopped earlier in the day, refrigerated, and then combined before serving. (You may want to combine the ingredients and the dressing about 30 minutes prior to serving and leave all at room temperature so the flavors will marry nicely.)
This recipe comes from a small cookbook called Vegetarian Cooking of the Mediterranean by Cornelia Schinharl.
Ingredients (4 servings)
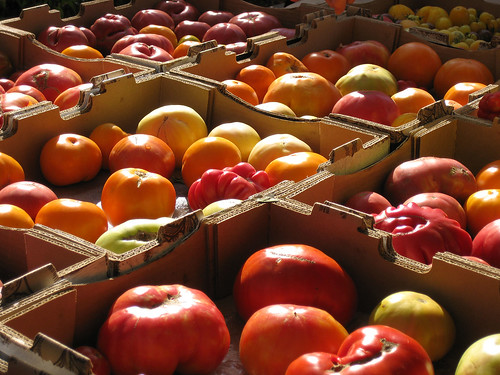
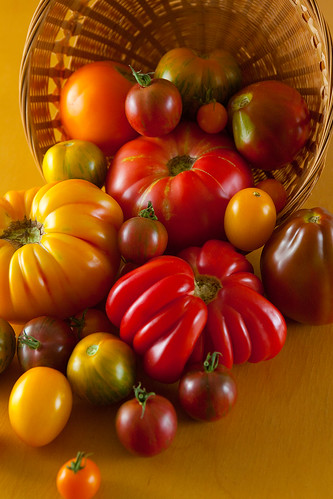
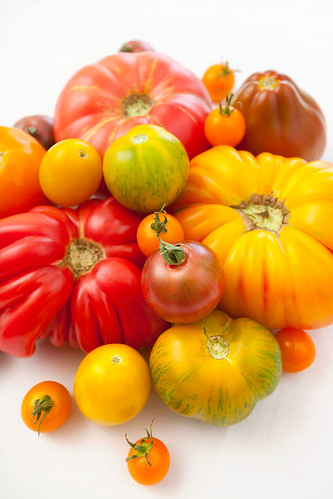
- 2 beefsteak tomatoes or 3-4 heirlooms (depending on size) The heirloom varieties add great color and flavor to this salad)
- 1 cucumber
- 1 red or torpedo onion
- 1 bell pepper ( I prefer to use the yellow or orange but red or green are also fine)
- 8 oz. feta cheese (firm block, not pre -crumbled)
- 1/3 cup whole kalamata olives
- handful fresh mint leaves
- 2 tbsp fresh lemon juice
- 1/4 cup olive oil
- 1/2 tsp dried oregano
- Salt and freshly ground pepper
In a small bowl mix the lemon juice, olive oil, dried oregano, salt and pepper. Taste for seasonings and add to veggies and cheese, toss lightly and serve.
I like to serve this salad with sliced , untoasted, bread; so tasty when used to sop up the juices from the salad.
Enjoy!

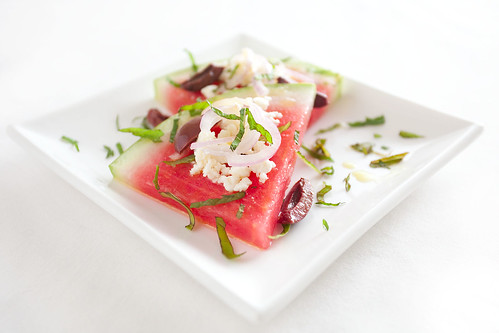
The Plating
I learned a lesson from last week's panzanella salid: rustic dishes need rustic presentations. So for this dish, I went for warm color and rough textures. The simple plate accentuates the simplicity of the dish, the colorful napkin echoes the warm colors of the salad and provides some texture. And the rumpled table cloth adds even more texture. I think this plating was 'mission accomplished'.
The Lighting and Photography
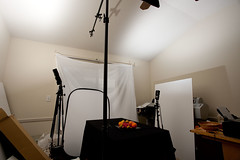
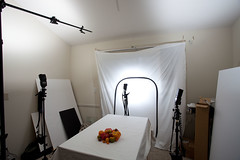
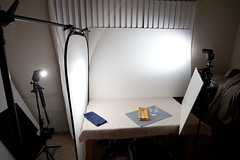
 Every week I look at food magazines and blogs and see all the wonderful diffuse window lighting that everyone - everyone but me - uses. I indeed have a window in my studio, but it opens onto the dark space between our house and the neighbor, and with the exception of a few minutes each afternoon, let's in precious little light. I hate that window, and I've been jealous of people with good window light since I started this blog.
The last straw came last week, when my wife and I went to dinner at a local Indian restaurant. When the sun sank below the trees, they opened the window shade at our table, and let in this amazing indirect light that bathed our food in a soft, warm glow.
That was it, I decided. "Goddamn it, I am going to have window light if it kills me." So I bought the biggest piece of foam core I could find (40x60 inches) and cut a nice window in it. Then I stood it up, added another large piece as a 'roof' on the top, stuck a single flash in the window bounced off a sheet, and started shooting.
And you know what? It actually works! I've only used it so far for this one dish, but I'm going to keep experimenting with it until I can consistently get lighting that indistinguishable from natural window lighting.
And yes, I realize that it's kind of a poor man's softbox - in effect if not in appearance. Hey, whatever works. I'm looking forward to a lot of great images shot with this set up!

Lessons Learned
There were a couple of lessons learned here:
There were a couple of lessons learned here:
- Match the plating and presentation to the food. Rustic dished should have rustic plating.
- You, too, can have window light, even without windows!