Tuesday, March 16, 2010

Scallop and Shrimp Scampi on Linguine

By the time we actually got to sit down and eat this dish, Jhan and I were both grumpy. This was such a beautiful and delicious-smelling dish, and we both knew that after 30 minutes of photography that it was stone cold. But I reheated mine enough for it to be warm without making the scallops or asparagus rubbery, and it was as delicious as it looked. Jhan followed suit, and we ended up having a wonderful meal.

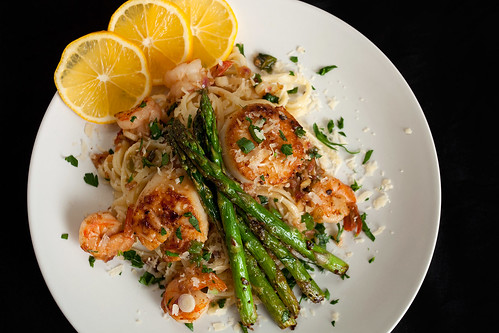
You couldn't ask for a better dish - it had many of my favorite food groups: the pasta, shrimp, scallop and asparagus food groups. It even had some grated Parmesan cheese on it!

Scallop and Shrimp Scampi on Linguine

The Food (Jhan)

This dish came about partly because we had both shrimp and scallops that needed to be used and also because the dish combines some of our favorite foods. The secret of this dish is to make sure that the shrimp and scallops are completely dry before cooking them; they'll get a nice carmelization that way. Make sure your pasta is on before you start cooking the seafood as the scampi cooks quickly. (The asparagus should also be in the oven roasting.)

Scallop and Shrimp Scampi on Linguine

Melt 1/4 cup of butter in a heavy skillet until it just starts to brown, add in the seasoned (salt and pepper)shrimp and scallops. On high heat, cook about 1-2 minutes on first side, add 4 large cloves of garlic minced, and 4-6 green onions chopped (1/2 in. of the white and 1/2 in. of the green). Turn and cook shrimp and scallops 1-2 minutes more on second side (you may need to do this in two batches). Move the skillet off heat, remove the seafood to a plate, return skillet to heat and add 1/4 cup vermouth and squeeze of a 1/2 lemon. Stir up browned bits on bottom of pan, simmer sauce until thickened and return the shrimp and scallops to the skillet, check seasonings. Drain pasta and plate. Add to skillet 1-2 tbsp chopped Italian parsley, a dash of lemon zest, mix to combine seafood and sauce, arrange over pasta. Add several stalks of the the roasted asparagus to the plate and sprinkle with coarsely grated Parmesan cheese. Serve immediately.

The Plating

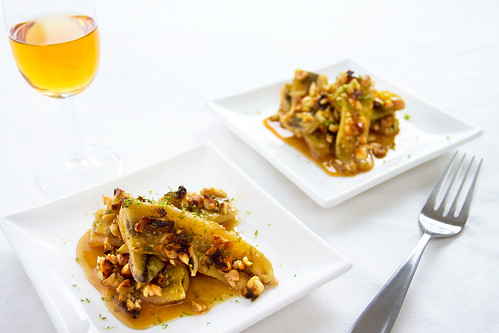
For this dish I wanted to go simple, simple, simple. All I wanted was food and plate. No setting, silverware or anything. I took a simple round white plate and put in on a white background.

As to plating the food, I'm still no plating expert. I wanted to try to stack the food like they do in restaurants, so I made a pile of pasta, put a couple of scallops on top, mounded the asparagus spears between the scallops and added some shrimp around the pasta. I added some thin lemon slices for color, but I'm not sure they really add to the plate.

Scallop and Shrimp Scampi on Linguine


The Lighting and Photography

Scallop and Shrimp Scampi on Linguine Lighting 
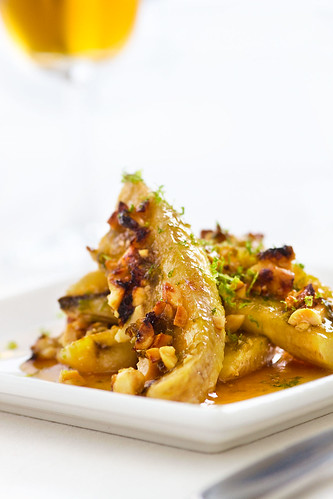
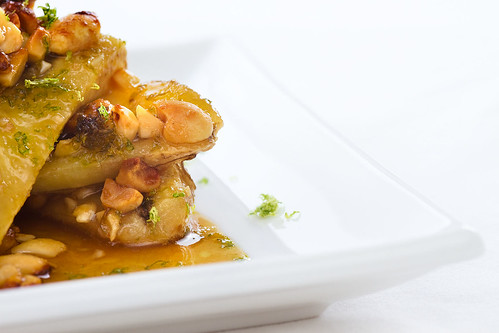
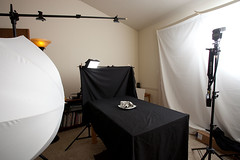
The lighting for this dish was difficult. I wanted to experiment with smaller lights (meaning having smaller lit areas, not smaller flashes), so I used very small light modifier (about 6x9 inches) instead of my usual large reflector or umbrella for the rear light. My thinking was that smaller light sources would mean strong specular highlights on the food, and specular highlights are a big part of the yum factor in food photography (because they make food look juicy, moist and fresh).


Scallop and Shrimp Scampi on Linguine


Scallop and Shrimp Scampi on Linguine Lighting
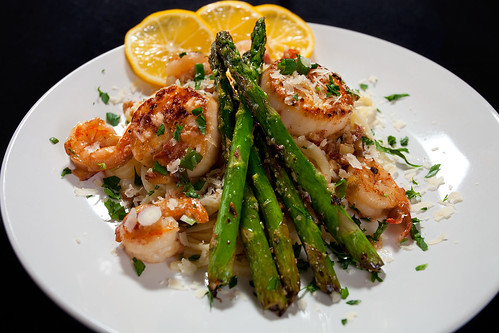
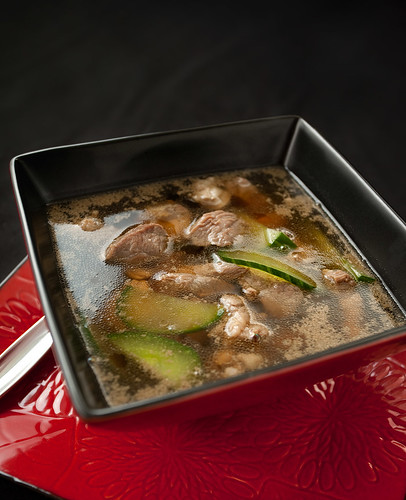
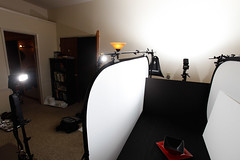
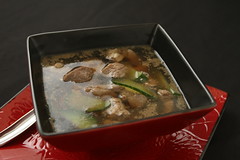
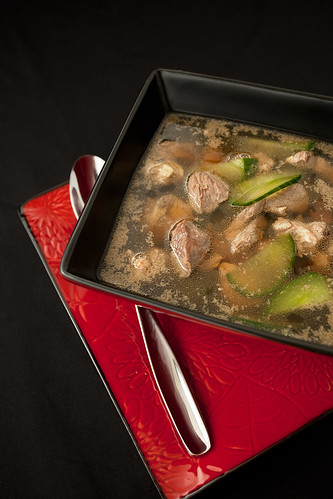
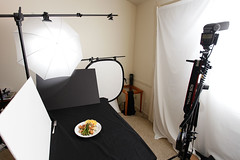
Although I thought this seemed like a good idea, it resulted in a very harsh light in the images I took (see image above). So after doing a large number of shots with this lighting, I reluctantly replaced the small rectangular modifier with an umbrella (see lighting shot below). I also changed the lighting ratio so that more light was coming from the flashes to the right of the dish.

These changes resulted in a softer overall lighting, but fewer specular highlights. I think I needed to spend more time repositioning the lights in order to maximize the reflective angles to get more of those juicy highlights to appear.

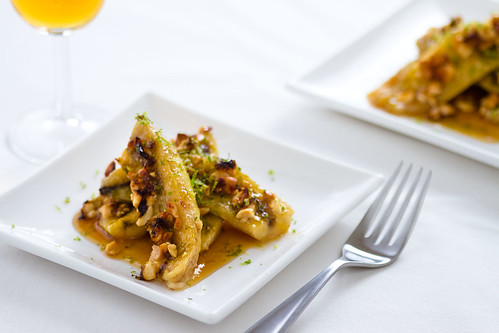
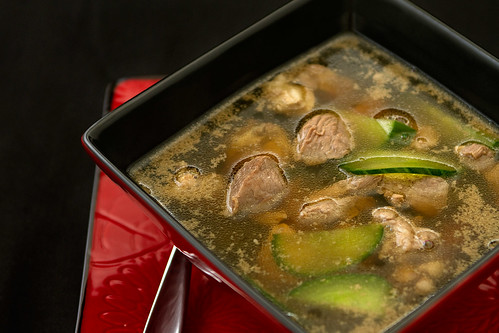
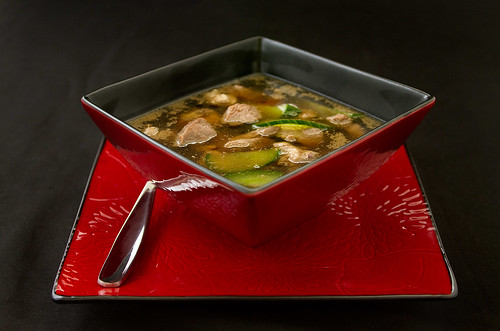
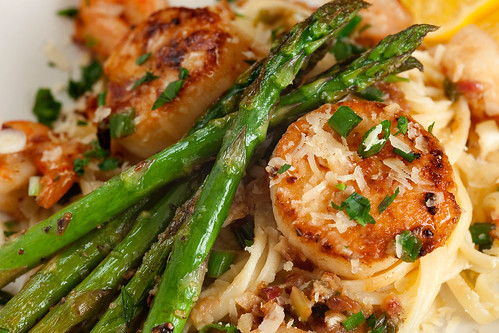
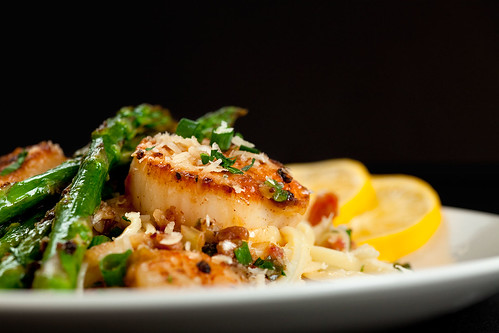
I also played with the height of the key lights to the right of the dish. Though they were bounced off a sheet, raising or lowering the lights had a real affect on the lighting. When the lights were high, I got somewhat flatly lit images like the one below. But when I moved the lights down (only did this for the last few shots), I got much more interesting side light (see the image at the top of the post).

Scallop and Shrimp Scampi on Linguine

Lessons Learned

One lesson Jhan and I keep forgetting is that we need to make just enough food for the shoot first, and have her cook the rest while I shoot. That way there is at least some fresh hot food.

Another lesson I learned was to pay more attention to the exact angle of rear lights so that I make sure to maximize the specular highlights that appear in the images. Also, small light sources don't necessarily mean more or better highlights.

Finally, I learned that placing the lights lower and create a more interesting side light - just as having the sun low near the horizon makes more interesting lighting in landscape photography.

Monday, March 8, 2010

Thai Caramelized Bananas

This week we decided to do a dessert, because, let's face it, nobody doesn't like dessert. We talked about a lot of possibilities, but finally settled on a caramelized banana with nuts dish that sounded scrumptious and seemed pretty simple. I'm not sure what exactly is "Thai" about the dish, but that's what Jhan wanted to call it.

Jhan ended up loving this dish, but I was only so-so on it. The dessert used lime juice and lime zest, which (although the zest provided a nice touch of green to the dish) was not a flavor profile that I felt went well with bananas.

Caramelized Bananas


Food (Jhan)


Tony and I love banana desserts like Bananas Foster and any carmelly kind of sauce, so I thought this recipe with the Carmel sauce and the salty, toasted peanuts would be just the thing.

This is an easy dessert and goes great with a scoop of good quality vanilla ice cream. The bananas are topped with brown sugar, butter, a little lime juice, and some chopped, roasted and salted peanuts and then broiled for about 5 minutes. When the bananas come out of the oven they are dusted with some lime zest. Couldn't be simpler!

I really loved these with ice cream. The Carmel sauce was sweet and gooey, the salty peanuts added a great crunch and the lime zest just slightly offset the sweetness of the bananas and the sauce.

I'm not sure why Tony didn't like the touch of lime but I felt that it added a decidedly Southeast Asian flavor to the dessert; fresh and tropical. Another possibility for this dessert is to substitute spiced rum for the lime juice. The rum would create a richer and sweeter sauce, but with the ice cream, the salted peanuts, and lime zest - it's great. (If using rum instead of the lime juice premix the butter, brown sugar, and rum and heat in a small saucepan to bubbling before pouring over the bananas you have prepared for the broiler.)

One more tip, start with fairly firm bananas as ripe bananas tend to break up once they come out of the broiler.

Caramelized Bananas


Plating

Jhan and I talked at length about which plates to use for this shoot. We went though my closet of plates and discussed a number of options. We finally settled on a pair of small square plates, mostly because they really fit the size of the dish. Also, the fact that I had two of them (a lot of the dishes in my 'collection' are one-zies).

I think the simple presentation, white on white, worked well in this case, bringing attention to the food. The glass of semillion dessert wine accented the colors of the dish, and the lime zest provided an interesting color highlight as well. I liked how the syrup on the bananas give them a little glisten so that they don't look too flat.

My only concern about the plating was that from certain angles the slices of bananas looked a bit too much like, uh, like, well, there's no nice way to say it... from certain angles the slices of bananas looked a bit too much like turds. I didn't see this during the shoot, and ended up having to throw out a lot of photos taken from angles that accentuated that unfortunate characteristic too much.

I still ended up with a lot of good shots, but I need to pay a bit more attention during plating to make sure that the food looks good from all angles.

Caramelized Bananas


Lighting and Photography

If you've read this blog, you know I've struggled with lighting bright subjects. But I think I've figured out that it's mostly an issue of under exposure - for whatever reason my system was doing that. For this shoot, I wanted a pretty "surround sound" type of lighting I placed my key light to the right of the dish, behind a reflector. I added a rear fill for reflections and sparkle, and a front fill bounced of the wall behind my position, to bring up the front side of the dish.

Overall, it turned out well. I'm happy with the brightness levels, the angles of the light, and highlights. I consider this a successful shoot.

I forgot to take a photo of the lighting set up, but I think my description outlines the set up pretty well.

Caramelized Bananas

Lessons Learned

The biggest lesson learned in this shoot was that I need to use the flash compensation on the camera more to control the exposure. I still consider myself to be a lighting novice, and I still don't understand how my system makes decisions on flash output, but I do know that it often makes poor decisions, and that using the flash compensation can, well, compensate for that.

I also learned that I need to pay a bit more attention when plating a dish to make sure it looks good from all angles. And I need to slow down a bit during the shoot to make sure that the angle I'm shooting is a good one for the dish.

Monday, March 1, 2010

Lamb and Cucumber Soup

We already know that "winter time is soup time" and that soup time is yum time. And we already know that Jhan's idea of soup is something that you can stand a knife in, Not that I'm complaining; it's just that I don't use the word 'soup' to describe something that you can serve on a plate. So, having had her idea of a soup, we decided to try something that more fit my idea of a soup: something actually soupy.

This particular soup turned out to be photogenic, delicious and warming - the triple crown for a hungry and cold food photographer. Of course, it didn't hurt that it had lamb in it!

Lamb and Cucumber Soup

Food (Jhan)


This soup was so beautiful and so tasty. I was actually very surprised at how well the lamb and cucumber went together. This soup is hearty but yet refreshing and is perfect for a blustery, wet day. The original recipe came from The Soup Bible (Debra Mayhew, Ed.). I made some small changes, but overall this recipe produces a flavorful and aromatic broth full of tender chunks of lamb and al dente cucumbers.

Ingredients
8 oz boneless lamb steak (I used some nice loin chops since lamb steaks are not regularly available in our small berg)
1 1/2 TBSPs light soy sauce
3 tsp dry sherry
3/4 tsp sesame oil
1 small cucumber, about 4 inches long
3 cups chicken or vegetable stock
1 tablespoon rice vinegar
salt and cracked pepper
Instructions
  1. Trim any fat from the meat. Slice lamb into thin strips. Marinate in the soy sauce, sherry, and sesame oil for at least 30 minutes to 1 hour. Discard any extra marinade when time is up.
  2. Do not peel the cucumber. Cut lengthwise and then into thin slices on the diagonal. (half moons).
  3. Bring stock to a boil and add meat. Stir well. Bring to a boil again and add the cucumber, vinegar and seasoning. Return to a boil again and serve immediately.
Lamb and Cucumber Soup

Plating

I'm not the biggest fan of Asian food, as you may know, but I do love the look of Asian food and Asian plates.

These bowls and plates were purchased at TJ Maxx for $3.95 each. I loved the shape of the bowls and the intensity of the red glaze against the black interior of the bowl.

When we decided to make the lamb cucumber soup, I knew the green of the cucumber would be a good counterpoint to the red plate and that the clear broth would go well with the Asian influences in the plate and bowl.

I kept the set up as simple as possible, mostly because I'm tired of busy place settings that end up looking crappy when photographed. Simple is simply harder to screw up. 

Lamb and Cucumber Soup


Lighting and Photography

Lighting for Lamb and Cucumber Soup
This was another dish where I wanted some nice reflections off the surface of the dish. But I'd already learned from the pot roast that too much light coming from the rear would cause overwhelming reflections.

So I placed the key light(s) to the left of the dish and bounced a rear fill light off the wall. I used a piece of black foam core to limit the location and amount of light hitting the dish from the rear. This took a bit of testing and tweaking to get just right, as you can see from the image below.


Lighting test for Lamb and Cucumber Soup
Lighting test - too many reflections


Once I got the level and angle of rear fill the way I wanted, I added a piece of white foam core to the right of the dish to fill in the shadows on the right front area of the dish. Overall, it was a very simple and successful shoot, and again showcases that I have a lot easier time with dark backgrounds than with light backgrounds. Someday, I'll understand why.

Lamb and Cucumber Soup

Lessons Learned

I think I said it best above: Simple is simply harder to screw up.