Monday, February 22, 2010

Sunday Slow Cooker Pot Roast

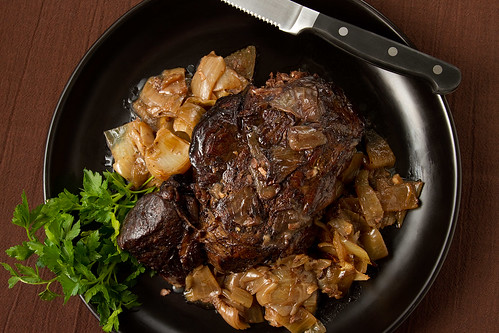
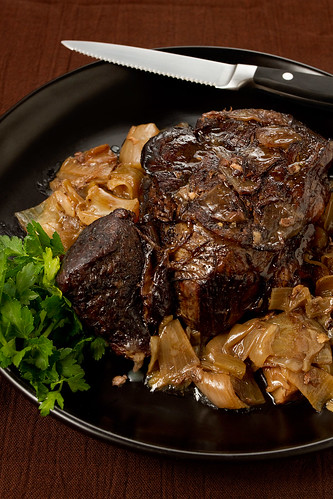
Mmmmmm.... Pot roast. I love a good pot roast. And this one was honestly one of the best pot roasts I've ever had.

My biggest complaint about pot roast is that it can be dry, dry, dry. But this one was tender and juicy and tasty - about as perfect as a pot roast can be. The other big plus of this pot roast: it filled the house with delicious smells all day.

Pot Roast

Food (Jhan)

I made this pot roast in the slow cooker and I just used what I had in the house. This is the easiest recipe ever and the result is a tender moist roast with a great gravy base.

Start with a 3-4 pound chuck roast that has had the fat trimmed from it. Marinate the roast in one bottle of nice red wine (choose something that you would like to drink), 3-4 crushed garlic cloves,and 2-3 bay leaves (use fresh if you can find them). Marinate overnight.

The next day, roughly chop one large onion and drain the roast and pat dry, reserve marinade. Heat some EVOO in a pan, saute onion until tender and just beginning to brown, remove to slow cooker. Add more oil to pan if needed and sear roast well on all sides , about 2-3 minutes each side.

Put roast into the slow cooker on top of the onions. Season roast with kosher salt and cracked pepper. Add about 1/2 cup of the reserved marinade (pull out the garlic and bay leaves) and 2/3 cup water to the the skillet. Bring to a rolling boil, stirring to scrape up the browned bits. Boil until reduced by 1/2 , pour over pot roast. Cook on high in slow cooker for about 3 1/2 to 4 hours.

This can be cooked (covered) in a 300 degree oven until it reaches an internal temperature of about 160 degrees. Drain the onions to serve with the roast and use the remaining juices to make a light gravy.

Pot Roast

Plating

Jhan and I discussed the plate to put the pot roast on, and though I initially gravitated toward a fancy plate that I've been itching to use, Jhan's comment was "too fancy". That put the proper perspective on the dish - pot roast is down home cookin', and it don't need no fancy-dancy plates.

So I went with your basic black platter, though I knew that a dark plate might fight with the dark meat. But my real goal was to try to bring our the highlights in the dish, and knew that a dark plate and dark background would help.

Pot Roast

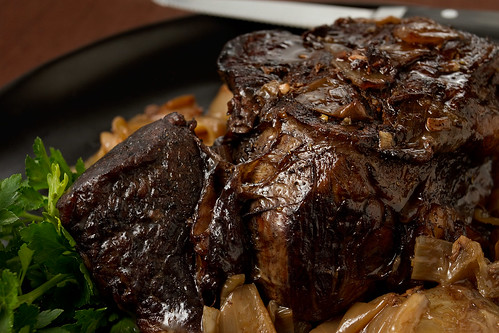
The meat had already finished cooking and was cooling on the counter when I started the shoot. As a result, it looked pretty dull and dry. So I basted the meat with some of the juice in the bottom of the slow cooker and added some parsley to the plate for color. Overall, I think it looks quite appetizing.

Lighting and Photography
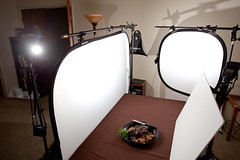
Pot Roast Lighting
I wanted to get a lot of juicy reflections off the meat, so I experimented with placing the key light to the rear. That resulted in really overwhelming reflections that didn't work at all (see image below).

So I had to switch the key light to the left side and had to tone down the rear light to only 1/4 or 1/8th power of the key light in order to keep the reflections from being overpowering. I added the white foam core to fill in right-front areas of the dish.

Pot Roast lighting test
Setting the key light to the rear was overpowering


The key light provided some nice juicy highlights on the front areas of the dish (see the reflections on the meant, onions, and front edge of the plate below), while the rear fill provided some nice, but not overpowering, reflections on the top of the meat, as well as a bit of shine on the knife blade. The reflector on the right helped keep the right side of the dish from being too dark.

Pot Roast

Lessons Learned

This dish turn out to be that challenging to photograph, but I did learn that controlling reflections and getting the kinds of reflections you want isn't as simple as you might think. I ended up adjusting light levels dramatically, as well as moving lights, in order to get the effect that I wanted.

Monday, February 15, 2010

Roasted Pepper and Green Bean Salad

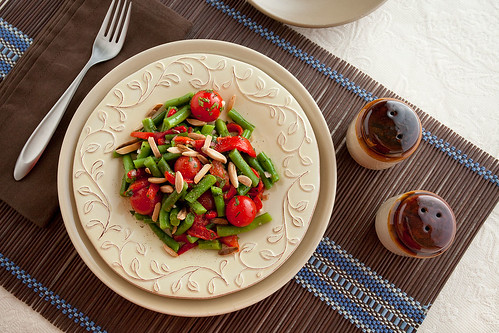
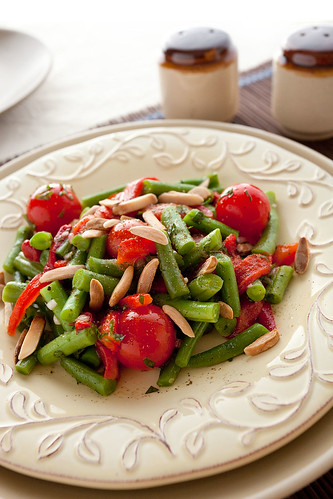
We did this shoot months ago and never got around to posting it. The idea of this shoot was to test red/green combinations and to shoot a vegetable-based dish. It was fine overall, though the green beans were a bit underdone and overly crunchy.

Roasted Pepper and Green Bean Salad

The Food (Jhan)

Inspired again by the late season bounty at our local farmers market I sought out side dish recipes that would be both a hearty and healthy accompaniment to a garlic roasted chicken. This salad recipe with the red peppers, mint, shallots and sweet cherry tomatoes hit the spot paired with our juicy, garlicky, chicken. It also really showcased the flavor of the the fresh green beans and the smokey sweetness of the roasted peppers.

Recipe

3/4 lb green beans
2 Red Bell Peppers , roasted, skinned, seeded and cut into strips
1/2 pound cherry or pear tomatoes
1/4 cup chopped toasted almonds
1 shallot, sliced
1 clove garlic, minced
1 tbsp parsley, chopped
1 tbsp mint, chopped
2 tbsp red wine vinegar
1/2 tbsp sherry vinegar
1/4 cup EVOO
kosher salt and freshly ground pepper

1. Roast peppers in usual manner, prepare for salad
2. In small bowl toss - shallot, garlic, vinegars and salt. Set aside for 10 min. then add in EVOO, pepper and salt to taste.
3. Cook green beans in boiling, salted water about 4-6 min - until just tender. Drain and cool to room temp.
4. Combine all veggies and herbs in a salad bowl. Pour shallot mixture over and toss. spread Almonds over top and serve.

Recipe from Food and Wine magazine.

Roasted Pepper and Green Bean Salad

The Plating

I wanted very simple homey plating for this dish, but ended up being attracted to the rather fancy plate that Jhan had bought. I think it works well with the dish, but the blue and brown place mat doesn't really work at all. I'm not sure what I was thinking.

As far as food styling goes, simple dish - simple styling. About the only thing I did was to add some salt and pepper ("too much pepper" says Jhan) to the dish for texture.
Roasted Pepper and Green Bean Salad

The Lighting and Photography

Roasted Pepper and Green Bean Salad lighting
Here's another dish where I decided to go with a single light. Though I have four flashes now, I find that in many cases, a single flash gives the best light.

On this case, I shot a single 580EX through a reflector to the right and slightly behind the dish with a piece of white foam core to the left and behind the dish to act as a fill light.

I think the close up shots, in particular, turned out well (partly because the blue and brown mat is less visible). There are nice highlights on the beans and tomatoes, but the shadows aren't too dark. Overall, I think it looks very appealing.

Monday, February 8, 2010

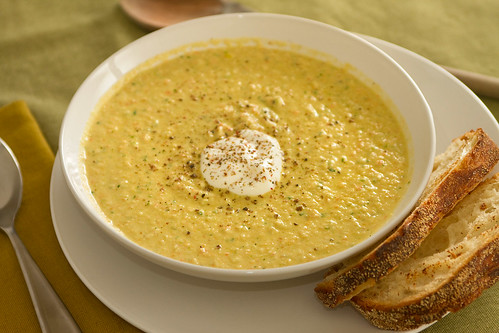
Chicken Almond Soup

Winter time is soup time. There's nothing better on a cold night than a hot bowl of soup. This chicken almond soup is something we've made before, and its a trusty and tasty dish!

Chicken Almond Soup

Food (Jhan)


We love books in our house so Tony and I usually end up at our local bookstore every weekend. I have a habit of perusing the bargain section looking for any useful cookbooks, and few years ago I came across The Soup Bible (Debra Mayhew, Ed.). This is now my go-to cookbook on a cold winter day. The book has a great collection of soups from all over the world and every recipe we've tried has been great.

This Chicken Almond soup is quick and easy to make and is very filling when served with some nice crusty bread. This soup, although pureed, does have a thick "texture" thanks to the ground almonds. I've modified the original recipe to cut down on calories and fat without loss of flavor

Ingredients:

4 Tbsp EVOO or EVOO and sweet butter
1 leek, chopped
1/2 tsp grated ginger
2/3 cup lightly toasted blanched almonds, finely ground
1 tsp kosher salt
a few grinds of black pepper
1 med sized fresh jalapeno chile, seeded and chopped
1 medium carrot, grated
1/2 cup frozen peas
2 Tbsp chopped cilantro
1 cup of cubed, raw, skinless, boneless chicken breast
2 cups water
1 cup low fat evaporated milk
chopped cilantro for garnish
  1. Heat oil in a deep pan or wok. Add ginger and chopped leeks, saute until soft.
  2. Lower heat and add almonds, salt, pepper, chopped fresh jalapeno, carrots, peas and chicken.
  3. Cook until veges are tender and chicken is completely cooked. Stir in 2 Tbsp cilantro.
  4. Cool mixture off heat until cool enough to go into blender or food processor. Process mixture briefly, add 1 cup water and blend again, add remaining water and pulse 20-30 seconds. (Mixture will not be completely smooth)
  5. Pour mix back into a pan and bring to a boil. Lower heat and add milk gradually, stirring until blended. Simmer 2-3 minutes. Garnish with chopped cilantro.
Chicken Almond Soup

Plating

I have a lot of bowls - white, blue black, red, big, small, deep, shallow, round square and even octagonal. It comes with the territory when your shooting food. But I made up my mind before Jhan even starting cooking that I wanted this soup in a simple white round bowl - so that's what this soup got.

Overall, this was a very simple setup. The only thing I was doubtful about was the table cloth. I knew the soup would be a greenish-brown color, so I went with a green table cloth, but I think a white on white set up would have made the color of the soup stand out more.

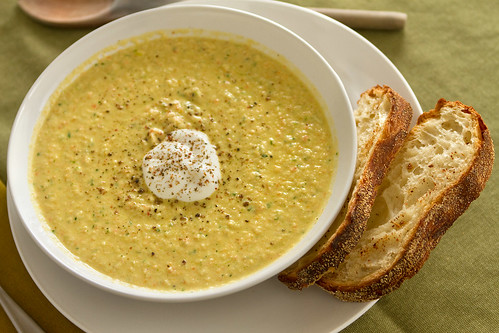
The dollop of 'sour cream' in the center of the bowl is actually cream cheese mixed with water to resemble sour cream. I added course ground pepper on top for texture. I also added a couple of slices of Jhan's fresh baked bread to add a different color and textural tone.

The biggest problem I had was that I filled the bowl in the kitchen and then carried it into the studio. In the process, I couldn't help but tilt the bowl a bit and that ended up leaving a ring with this thick soup.

Chicken Almond Soup

Lighting and Photography

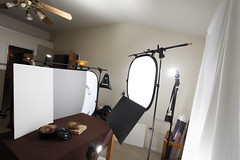
Lighting for Chicken Almond Soup Shoot
Lighting for this shoot was very similar to the bread shoot (they were done only an hour or so apart), but had very different effects on the food and provided very different results.

Where I loved the lighting for the bread, the lighting for the soup proved problematic. Sure, overall, the images came out OK, but they don't have either the warmth or punch of the bread shots.

The only real difference in lighting in this shoot was that I moved the ceiling bounce light from directly over the dish to directly over the photographer - placing it a bit in front of the dish. Otherwise, the lighting is identical, but the effects aren't. In most of the images, the lighting seems a bit flat and dull - uninspired, I guess.

Lessons Learned

Well, I didn't learn much about lighting in this shoot other than what works great for one subject can fall flat for another.

The main lesson I learned in this shoot was to fill bowls with soup in the studio so that so rings form from the soup sloshing as it's carried from the kitchen to the studio.

Chicken Almond Soup

Monday, February 1, 2010

No Knead Bread

Bread. Who doesn't love fresh-baked bread? I think it's in our DNA to love fresh bread. It fills our homes with the best possible smell; its warmth and wonderful texture is amazingly comforting.

Well, Jhan has been wanting to make bread for quite a while, but with her damaged wrist, all the kneading is a real challenge. But the new knead-free bread book she got has let her start exploring her inner baker.

Photographically, these loaves were beautiful, but this particular bread-making technique produces crusts that a bit too... well, crusty for me.

Bread

Food (Jhan)

I've had Jim Lahey's My Bread on my Amazon wish list since June and even with all of the gift giving of the holidays did not receive it. I gave in and bought it for myself last week and this bread is my first attempt at making Lahey's basic bread recipe.

In my "Hippie" past I used to make 2 loaves of whole wheat bread every week for the family. I loved making bread and the wonderful smell of fresh baked bread in the house... but I hated the kneading, the fussy yeast cakes, and trying to find just the right temperature for the dough to rise. Needless to say I had my share of failures over the few years that I endeavored to provide fresh, homemade bread for my family - so I was delighted to hear about a "foolproof" no knead bread recipe.

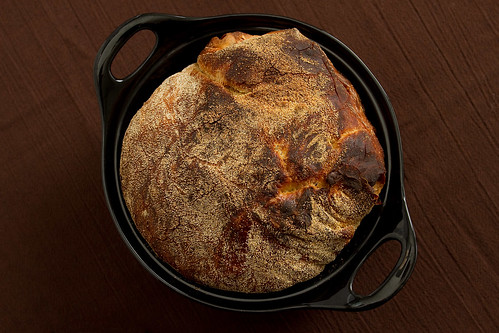
Overall, I was pretty pleased with the results of my first try. The method is sooo easy, and even in our freezing cold (eds note: 68° F) house the dough rose beautifully. The dough had a wonderful silky quality when it was ready to be shaped, it does remain quite sticky though even with a dusting of cornmeal. I didn't have a large enough pan to bake the entire boule in, so I cut off about I third of the dough and baked the bread in two loaves.

I didn't notice any real difference between the loaf baked in the cast iron casserole and the loaf baked in the ceramic casserole; both of them had a nicely browned crust. The interior of the bread reminds me of sourdough in that it's chewy and "airy" with a nice flavor - great! But the crust was a bit too crunchy for us - next time I'll probably put a small amount of butter on the crust as it cools, not a lot, but just some to soften up the top crust enough to cut or bite into comfortably. This bread is great to eat warm with a little butter, or to sop up soup or stew. And as bruschetta or maybe with cheese, salami, fresh basil and a good mustard, it would be fantastic!

This was a great experience and I can't wait to try more of the recipes in My Bread.

Bread

Plating

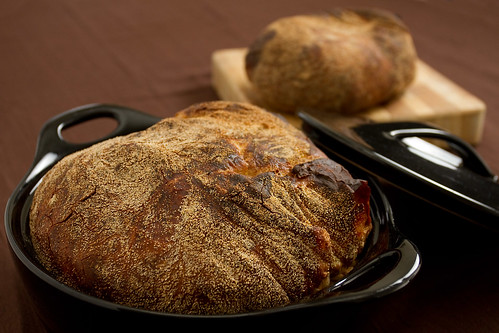
Plating was simple for this shoot - the loaves were baked in pans, so I just left one loaf in its pan and put the other, smaller, loaf on a wooden cutting board. I wanted warm, homey, earthy tones, so I went with a brown table cloth.

Other than the cutting board and the one pan, there is nothing else in the shots. Because it's a simple subject, a loaf of bread could easily be overshadowed by plates, knives and other objects in the photo. I made sure to keep the images clean and simple by eliminating everything except the bread and whatever was needed to support it. That approach worked well in this particular shoot.

Bread

Lighting and Photography

Lighting for Bread Shoot
The lighting for this shoot was fairly straightforward: key light to the right of the bread, bounced off white sheet; fill light to rear of bread, shoot through a reflector; second fill bounced off ceiling to provide soft, even fill light.

This light, so similar to that I used an hour later for another shoot, worked wonderfully here, creating warm soft tones in all of the photos. But virtually identical lighting didn't work so well in the following shoot. It's still a mystery why one lighting will work so well with one subject and create such a horrible lighting mess with another subject.

I 'm beginning to think that it has a lot to do with the tonal quality of the background (typically the table cloth) in the images. As usual, I'm still having better results with dark backgrounds than with lighter backgrounds. However, I have started to get smarter about manipulating my exposures than I was before. I'm still relying on the wireless flash transmitter to control the remote flashes, but I'm using a combination of flash ratios and on-camera flash exposure adjustments to better handle overall exposures. However, I need to start paying more attention to histograms in order to make sure that the exposures are correct.

Bread


Lessons Learned

Use on-camera flash exposure compensation to assist in obtaining the best exposure, since the best exposure can change dramatically by moving only a few inches.